How to Make a Game Pass on Roblox (8 Easy Steps)
Game passes are one of the best ways to monetize your Roblox experience. This guide walks you through the entire process — from opening the Creator Hub to setting a price and grabbing your Pass ID for scripts.
Overview
In this tutorial, you'll learn how to create a game pass, customize it with a name and thumbnail, enable sales, and set a price in Robux. We'll also show you where to find your Pass ID so you can use it in your game scripts later.
What you'll need
- A Roblox account with publishing permissions.
- A published (or saved) experience in your Creator Dashboard.
- An image for your game pass thumbnail (512x512 pixels works best).
Step 1: Open Roblox
Start by launching Roblox. You can do this either through the Roblox Player app on your computer, or by visiting the Roblox website in your browser. Make sure you're logged into your account.
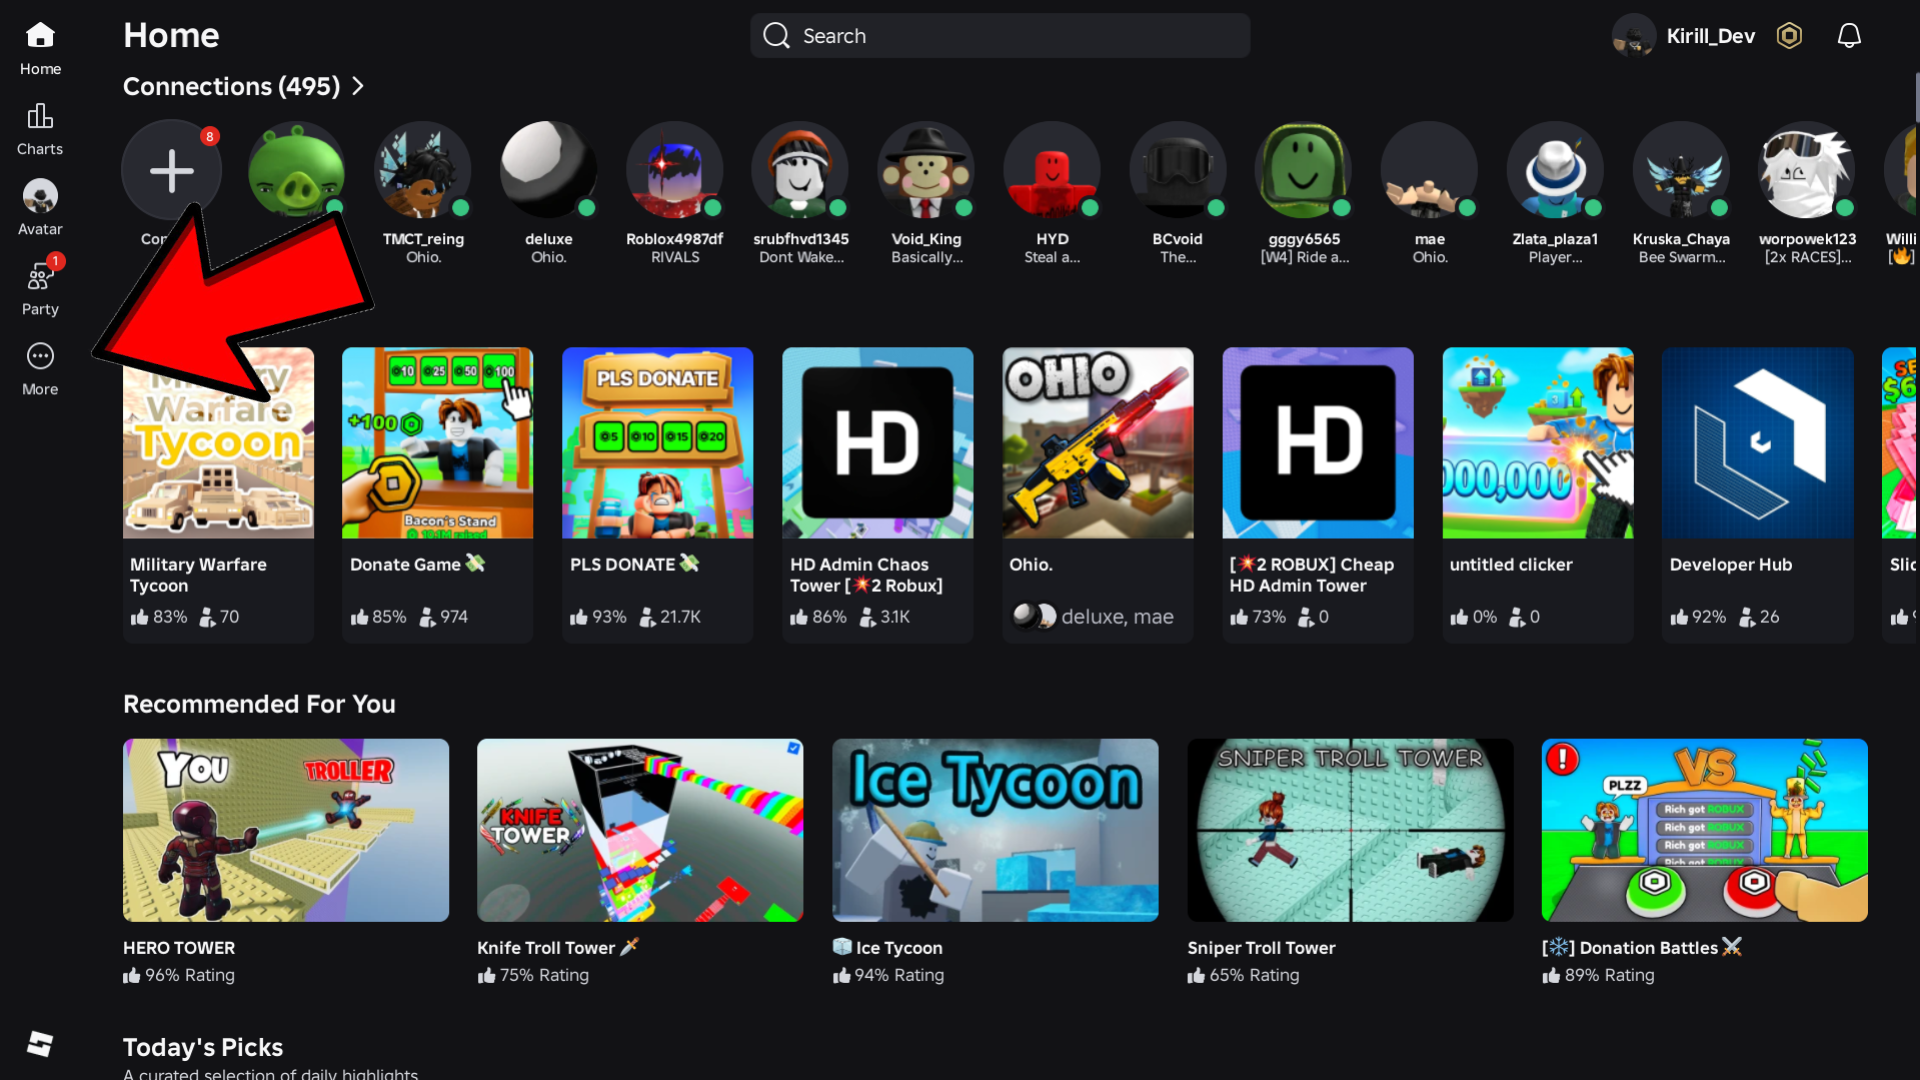
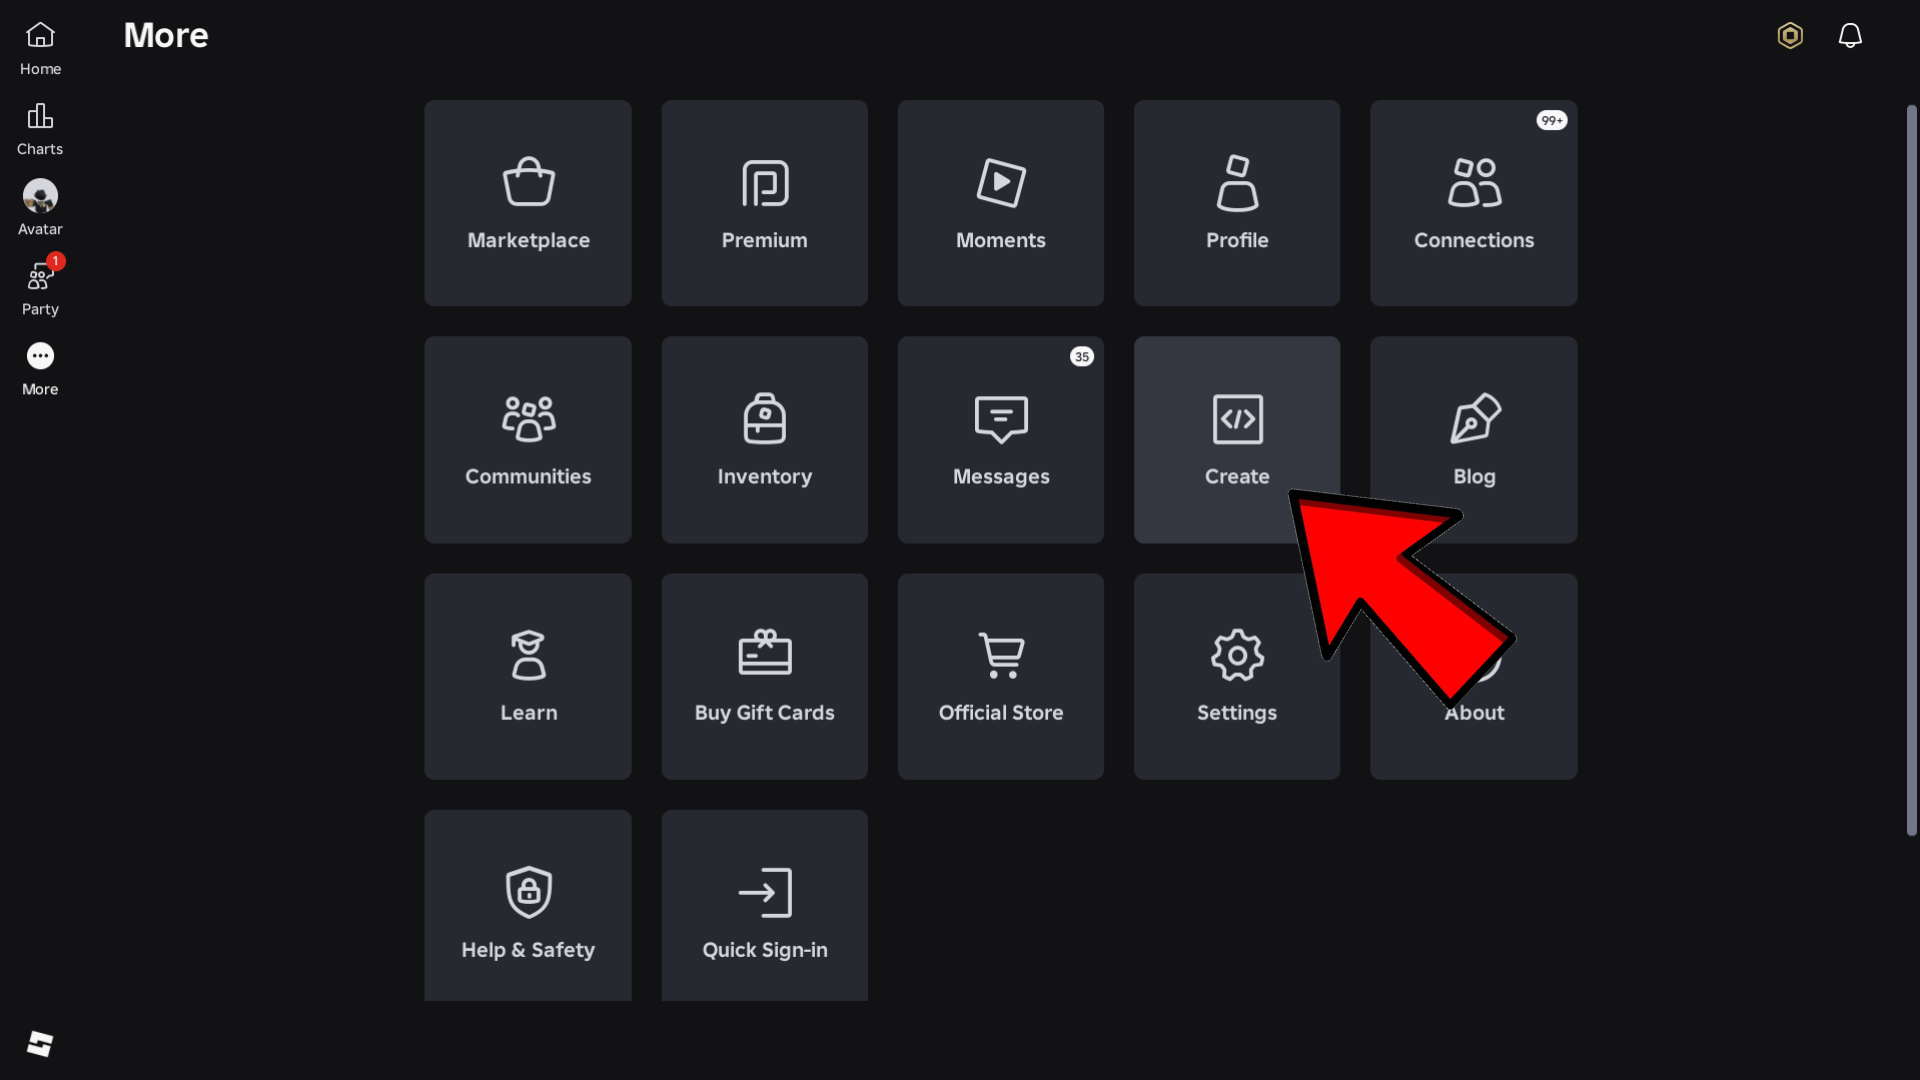
Step 2: Go to Create
Once you're logged in, navigate to the Creator Hub (also called the Create page). On the website, click the "Create" button usually located in the top navigation bar. If you're using the app, you might need to click "More" and then look for the Create option.
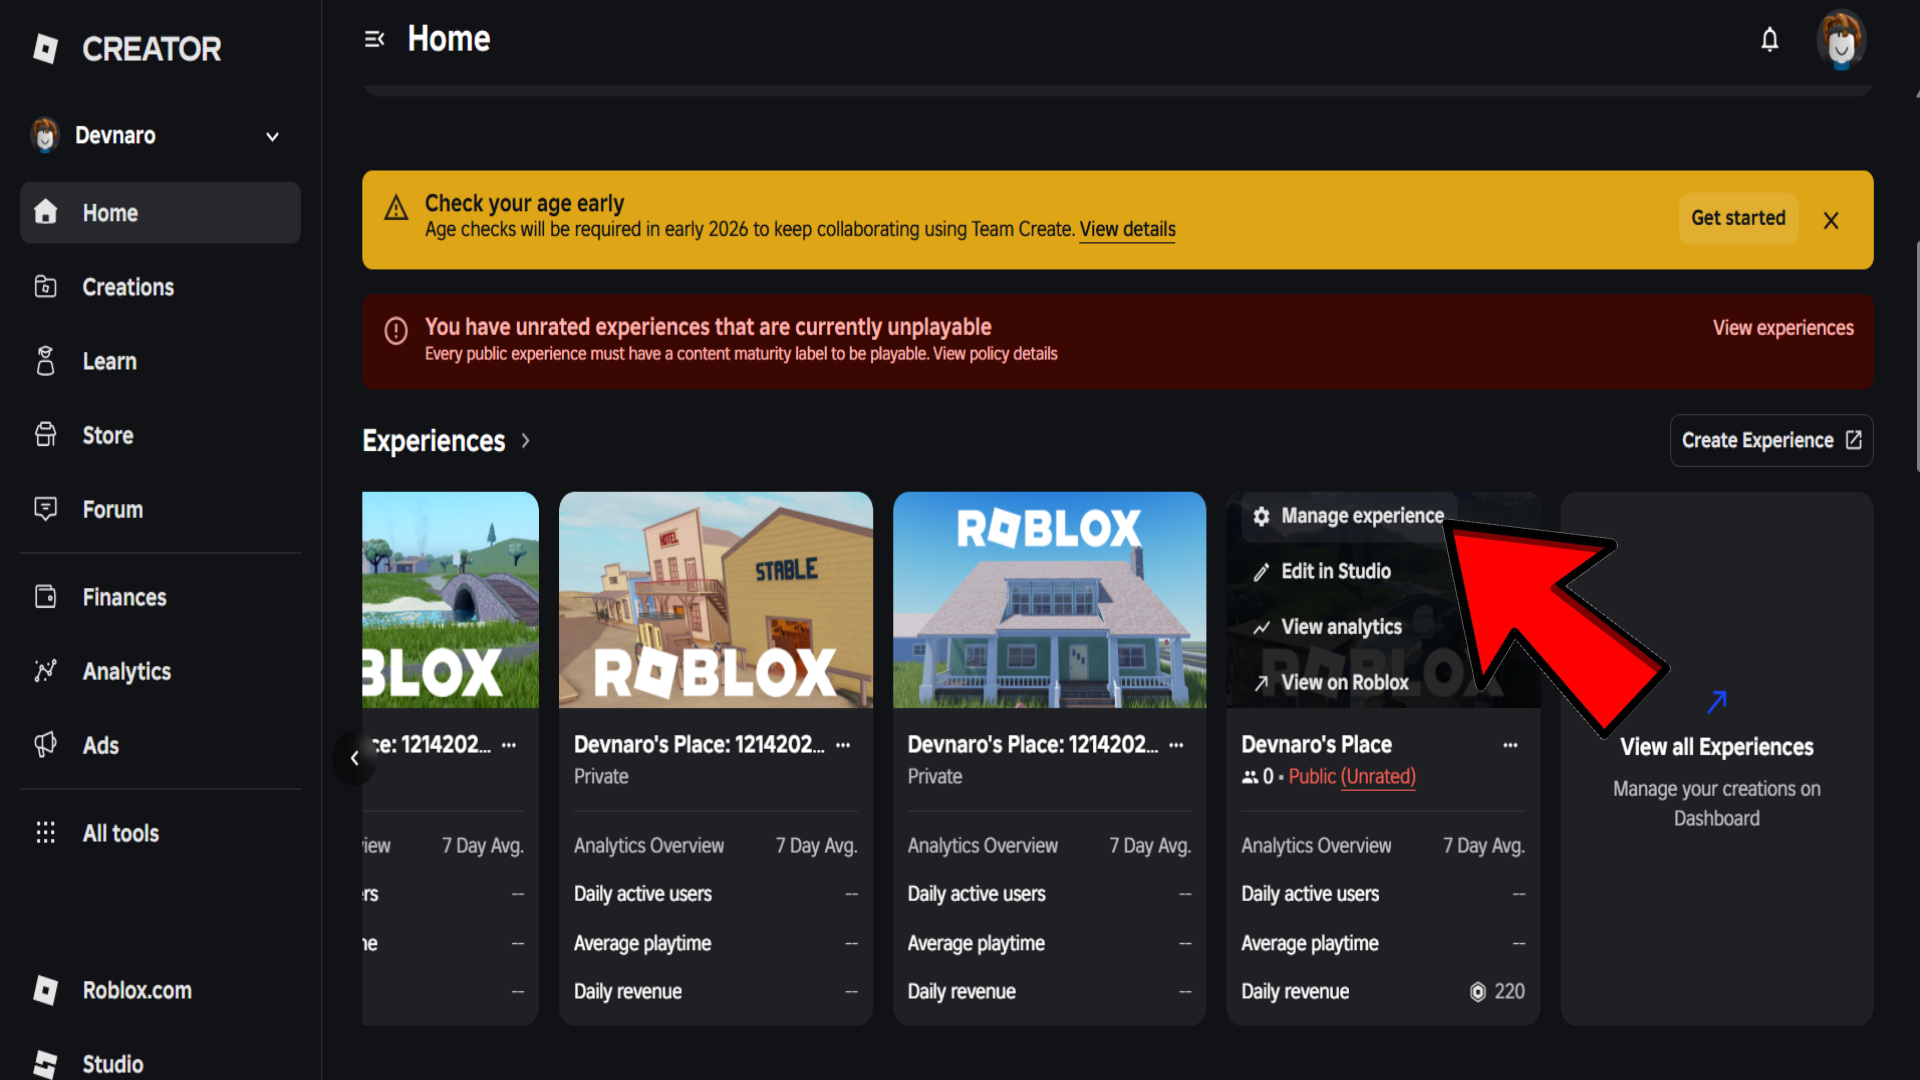
Step 3: Select your game
In the Creator Hub, you'll see a list of your experiences under the "Experiences" tab. Find the game you want to create a pass for and click on its title or the "Manage experience" button (often represented by a gear icon or a menu button).
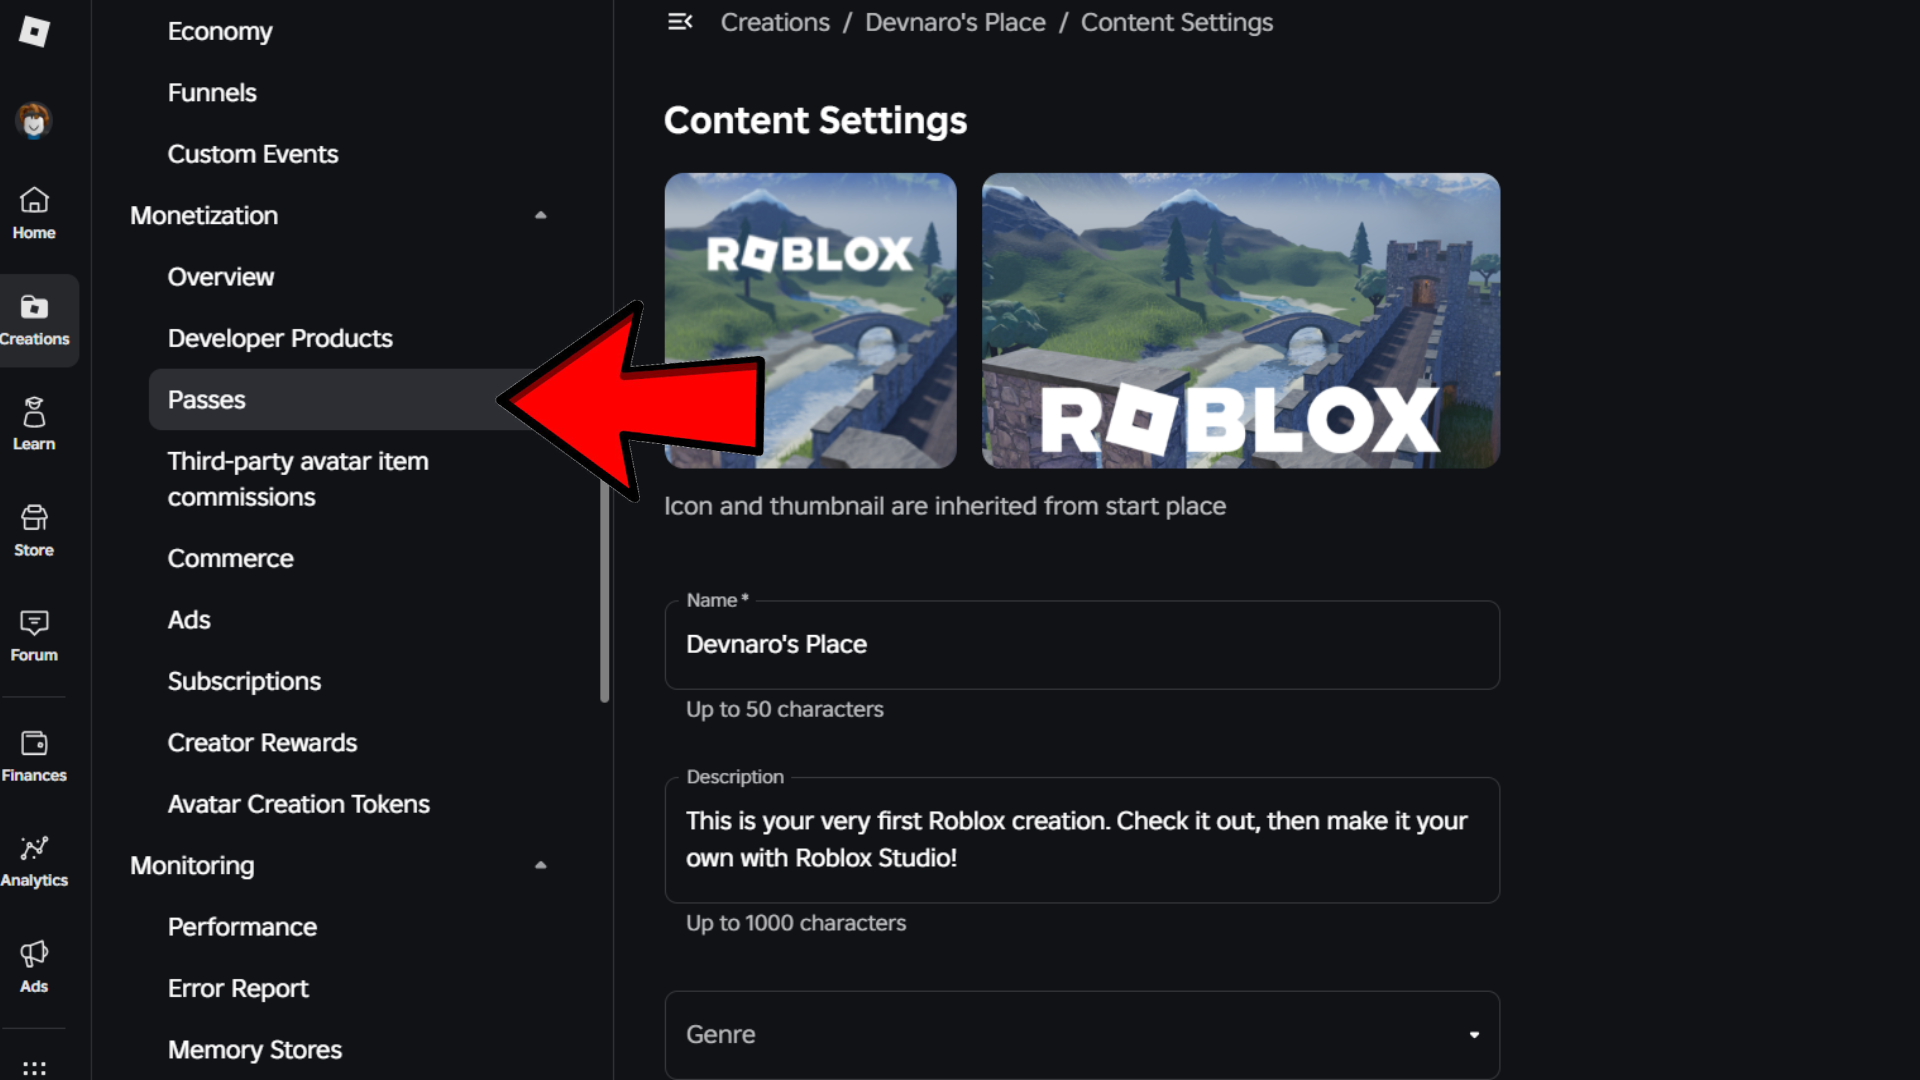
Step 4: Go to Passes
Inside your game's management panel, look for the "Monetization" section in the left-hand menu. Click on it, and then select "Passes". This is where all your game passes for this specific experience are managed.
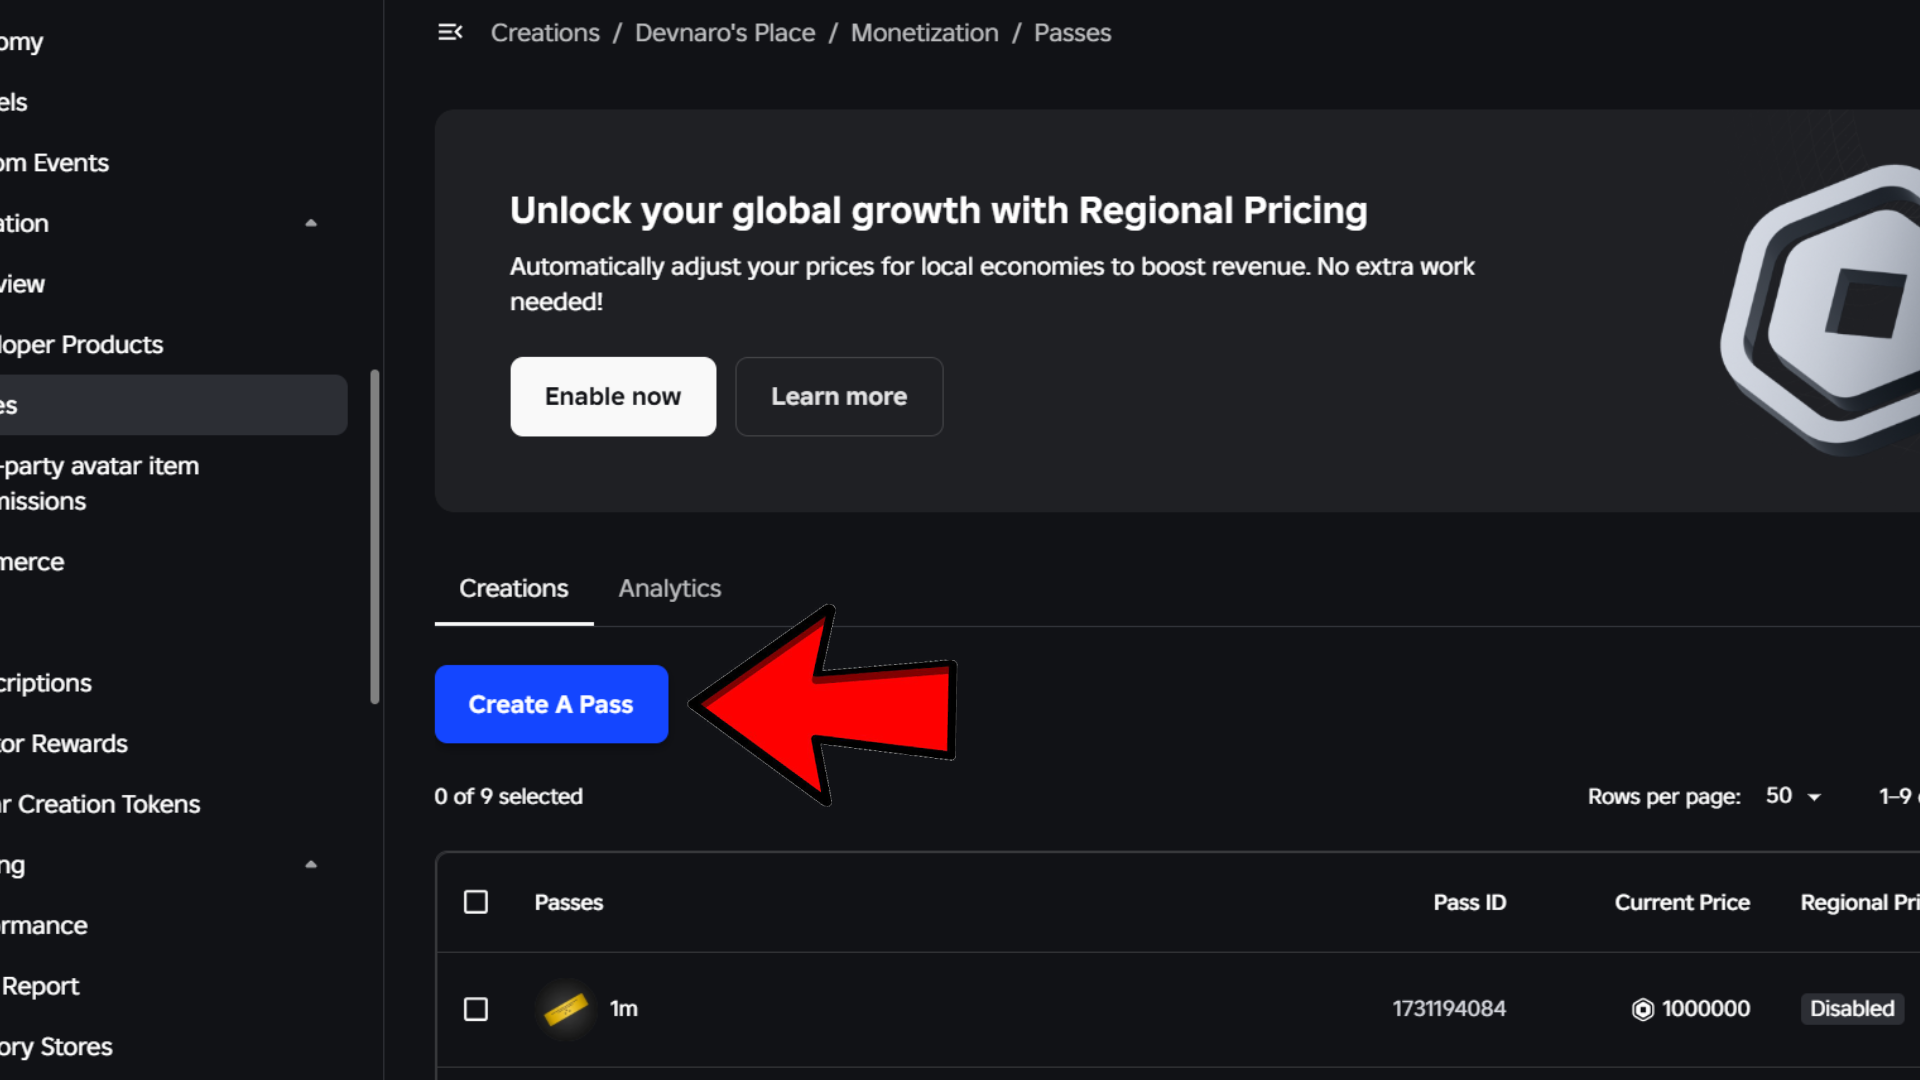
Step 5: Click on "Create A Pass"
On the Passes page, you'll see two tabs: "Creations" and "Analytics". Make sure you're on the Creations tab. Click the big blue button that says "Create A Pass" to get started.
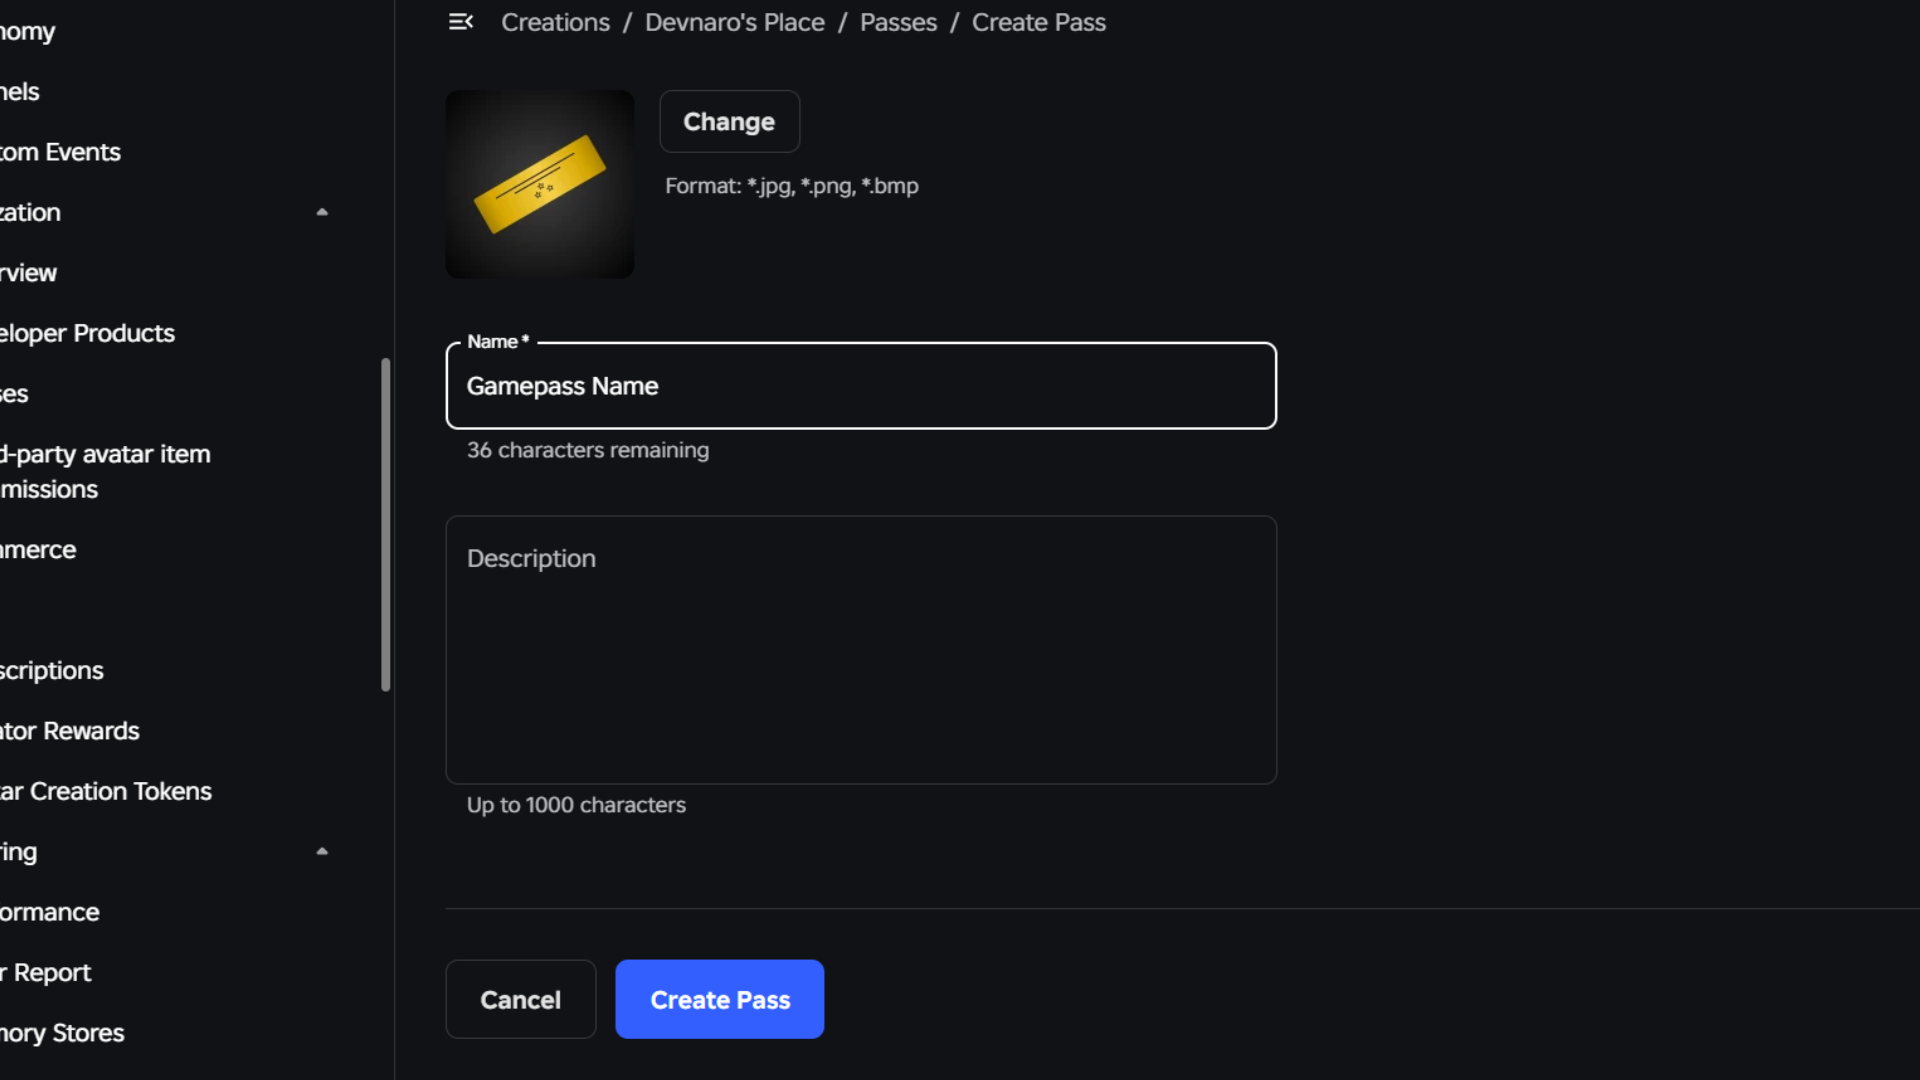
Step 6: Customize your game pass
Now you can set up how your pass looks. Fill in the following:
- Name: Make it clear and appealing (e.g., "VIP Access" or "Double Jump").
- Description: Explain what the buyer gets.
- Image (Thumbnail): Upload a 512x512 pixel image. If you don't have one ready, Roblox will provide a default placeholder for now — you can change it later.
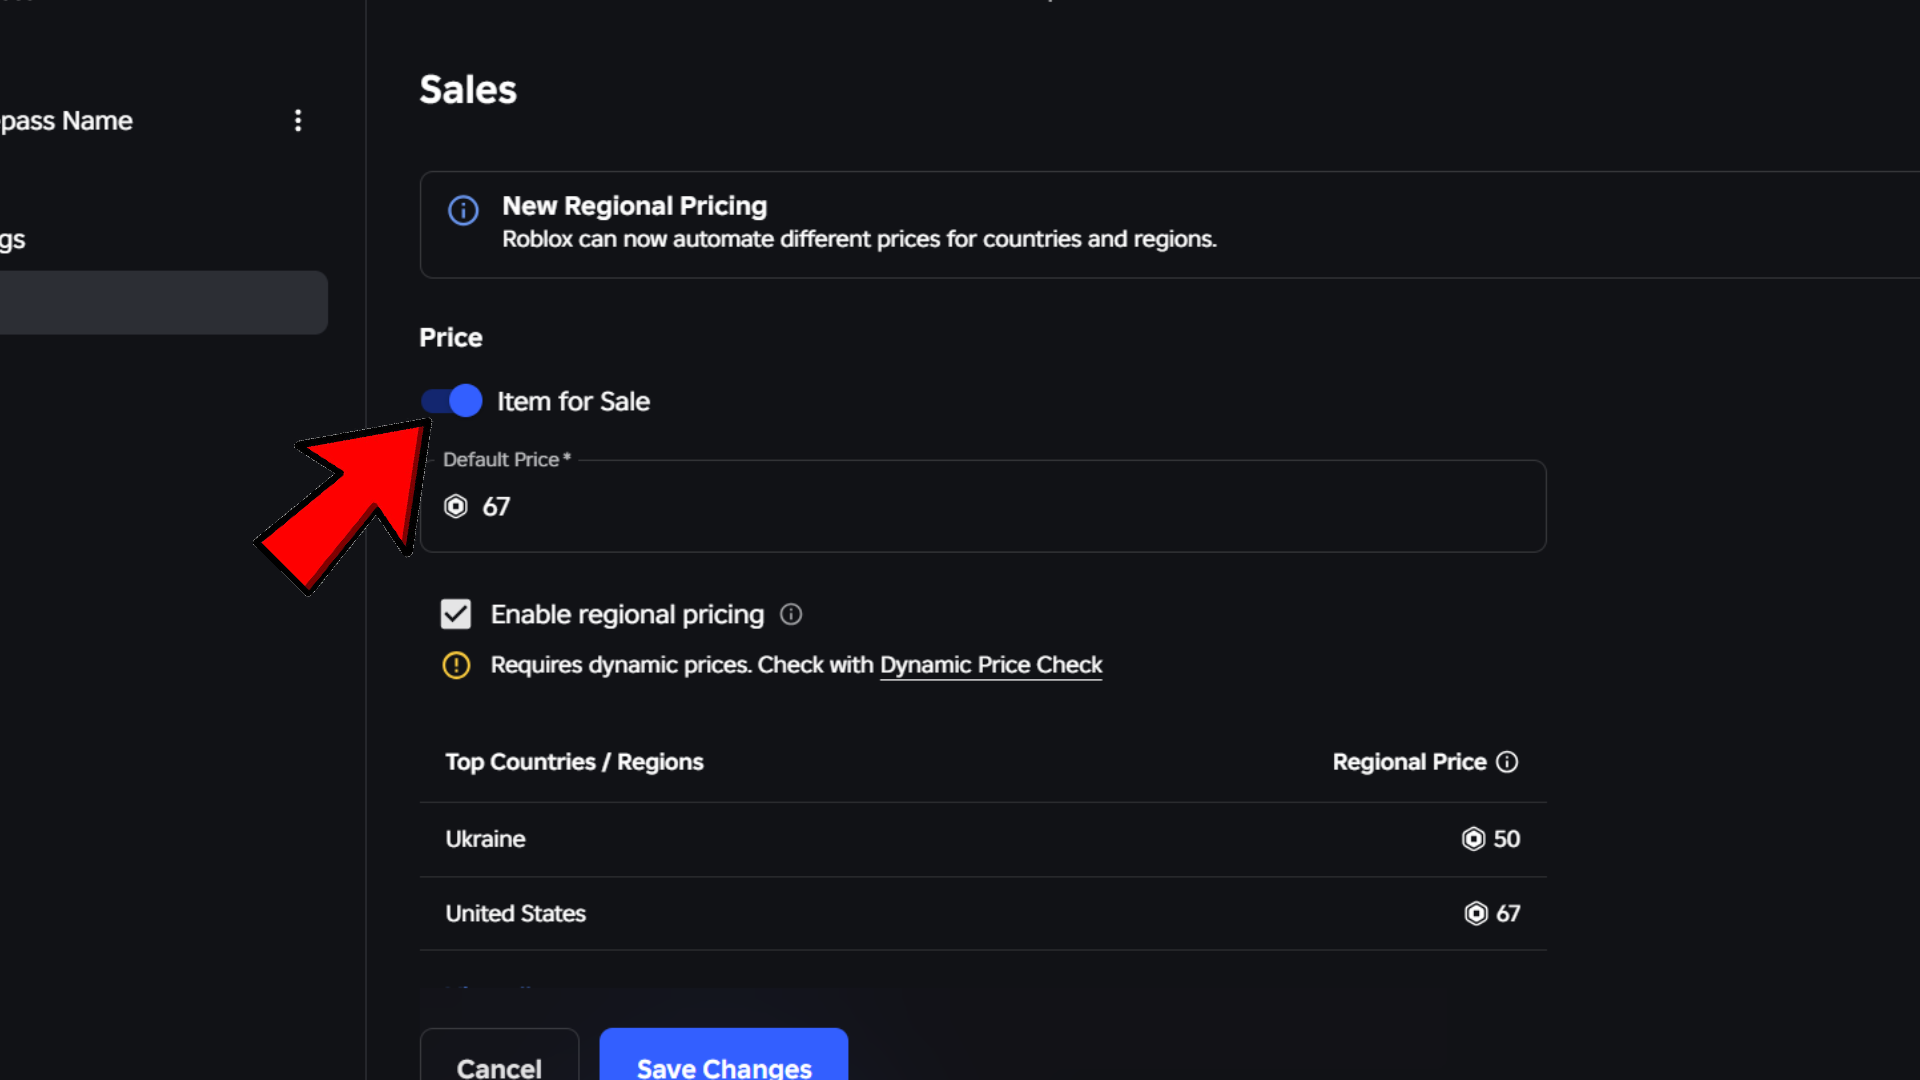
Step 7: Sell your game pass
Your pass is created, but it's not for sale yet. Find your new pass in the list under the Creations tab and click on it to open its settings. Go to the "Sales" tab. Toggle the switch to enable "Item for Sale".
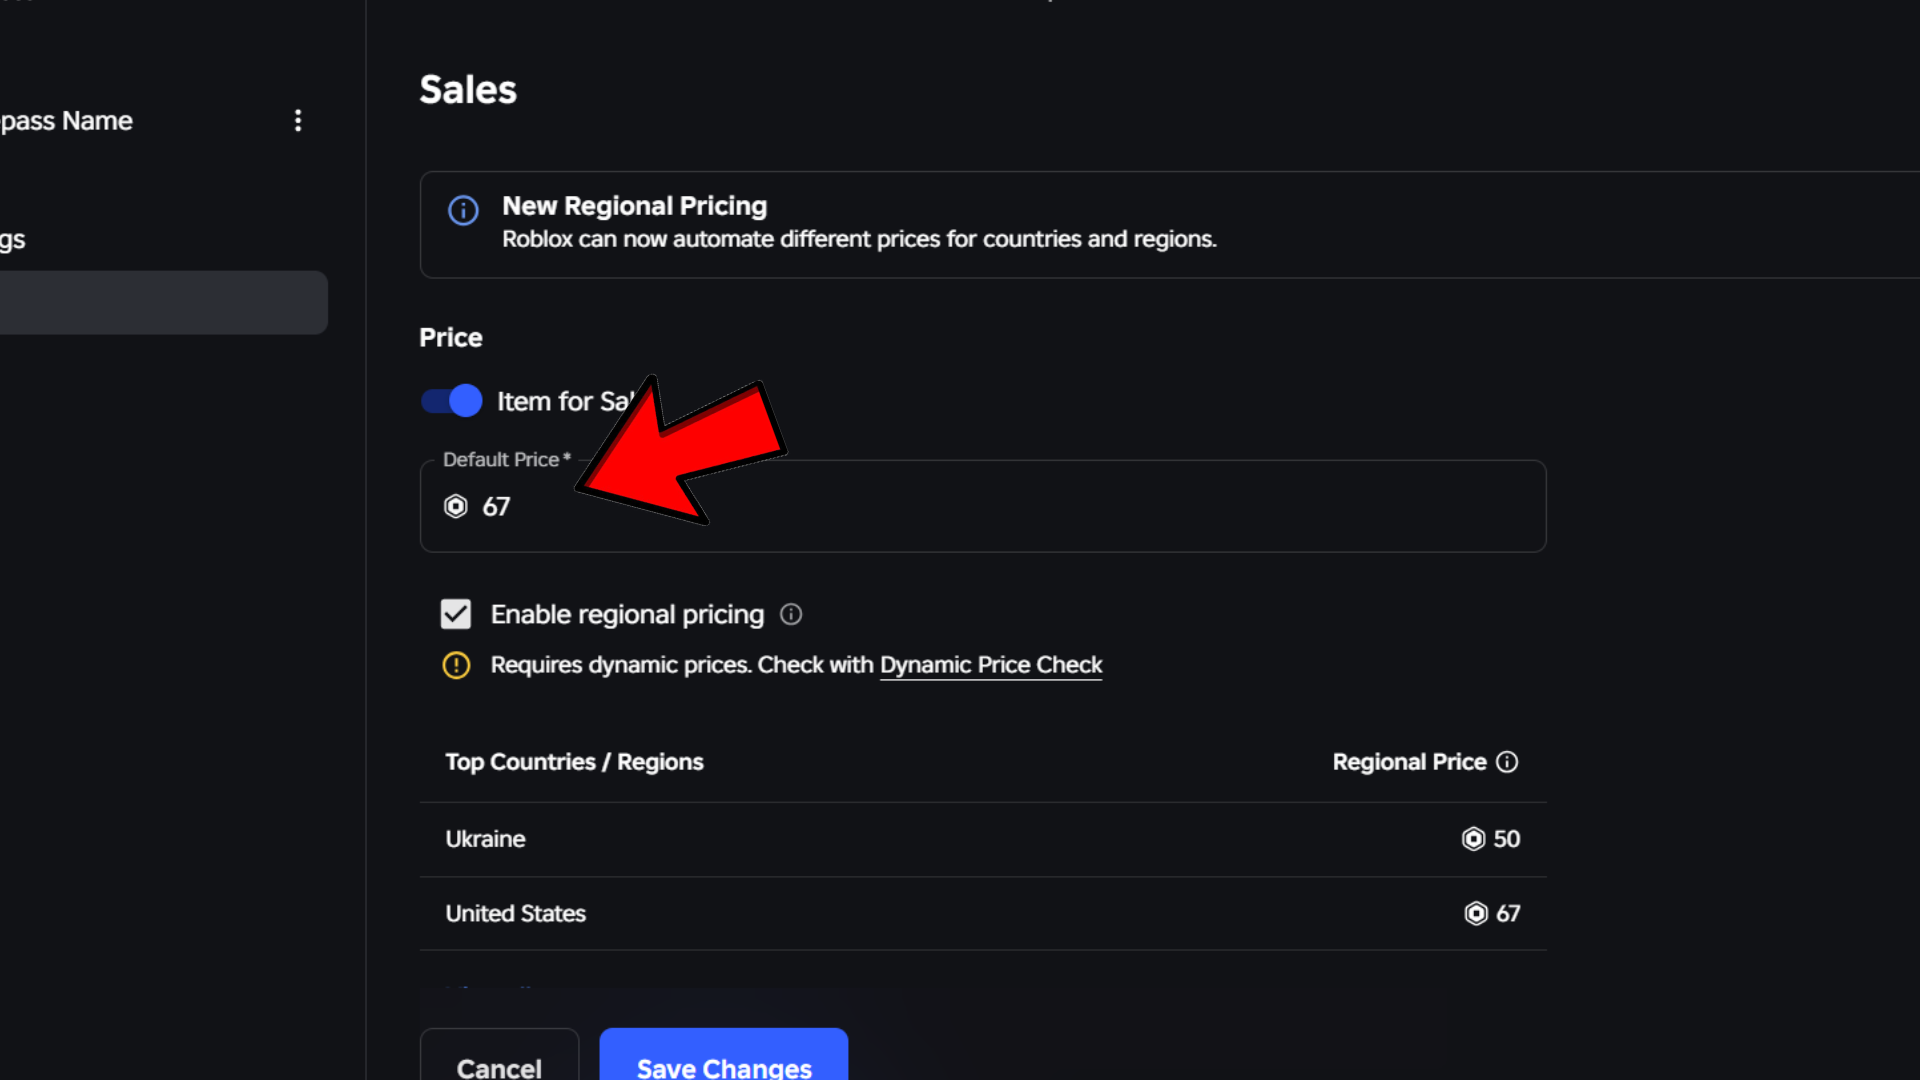
Step 8: Set a price
Once sales are enabled, a field will appear to set the price. Enter the amount of Robux you want to charge. Remember, you earn 70% of each transaction (Roblox keeps 30% for platform fees). Click "Save Changes".
Congratulations! You've just created your first game pass. To see its public page or copy its ID for scripting, click the three dots (...) on its image and select "Open in New Tab". The ID will be the long number in the URL.
Using the Pass ID in a Script
After you have your Pass ID (the number from the URL), you can use this basic script to check if a player owns the pass. This should be placed in a Script inside ServerScriptService.
local MarketplaceService = game:GetService("MarketplaceService")
local PASS_ID = 123456789  -- ЗАМЕНИТЕ НА ВАШ ID

game.Players.PlayerAdded:Connect(function(player)
    local success, ownsPass = pcall(function()
        return MarketplaceService:UserOwnsGamePassAsync(player.UserId, PASS_ID)
    end)

    if success and ownsPass then
        print(player.Name .. " owns the pass! Grant benefits.")
        -- Здесь добавьте код для выдачи преимуществ (например, дать двойной прыжок)
    else
        print(player.Name .. " does not own the pass.")
    end
end)MarketplaceService:UserOwnsGamePassAsync() in a pcall() to handle potential errors (like network issues) without crashing your script.
Frequently Asked Questions
How much Robux do I earn from a game pass sale?
You earn 70% of the Robux price you set. For example, if you sell a pass for 100 Robux, you will receive 70 Robux. The remaining 30% goes to Roblox platform fees.
Can I change the price after publishing?
Yes, you can change the price anytime from the Sales tab. However, be mindful that changing prices frequently might confuse players.
My ownership check fails in the script. What's wrong?
This usually happens for a few reasons: 1) The Pass ID is incorrect. 2) The game is not published (it must be public). 3) You're testing in Studio without a valid Roblox player. 4) Temporary API issues. Always use pcall to handle errors gracefully.
Do I need an image to create a pass?
An image is highly recommended for sales, but Roblox provides a default placeholder if you skip this step. You can upload a custom image later.